
Recently I was able to convince my hubby that we should trim our 40′ tall ficus hedge instead of hiring it out, and here’s the good, the bad, and the ugly so far…
Before I get to that, let me back up a bit. A year or two after we got married, (around 2014) we ripped out the wonky chain link fence that went around our property, built a wall out of recycled concrete (that story is for another day), and planted 125 ficus hedge plants. At the time, the plants were 3′ tall, and we planted them 3′ apart. We wanted to create a private oasis, and we definitely accomplished that!
Fast forward to today- we were supposed to have trimmed the hedge years ago, but injuries and life kinda got in the way. So when we asked a few companies for quotes, we were shocked by the estimates they gave us.
These plants were basically part of the family now, so I didn’t want to trust just anyone to work on them. When we interviewed potential businesses, I asked for referrals and previous photos of hedges they’ve worked on. I also asked them a ton of questions that I thought they should have the answers to – especially since many of them said they’ve been in the tree trimming business for decades.
After having a bad experience with a concrete contractor, I made sure to be thorough. There were a couple of strong contenders, but their prices were all very high. After my initial interview with each, and they sent me photos of hedges they’d worked on, it was a “no thank you” for me.
Whether it’s price or lack of finding someone that can do a great job, if you’re thinking of cutting your hedge yourself, I’m here to tell you that it’s totally doable, and it’s so much fun. It’s work for sure, but the good kind that you can be proud of at the end of the day.
After stalking professional tree trimmers on Instagram for the past year, we decided to buy this 24′ ladder for maintenance, and we love it. But once we decided to tackle the entire hedge – basically cutting back 125 trees – we knew we needed to rent a boom lift of sorts to help us reach everything safely. Safety is key!
Honestly, the boom lift is so fun! I would 100% recommend this. We rented it for the month so we didn’t kill ourselves trying to rush, and I’m so glad we did. Tips: Work in the shaded areas when possible, work every other day, work for half the day on the days you do work. Unless you’re used to this kind of work, your body will need a break. I’ve been taking epsom salt baths, doing red light therapy, and icing. Just like when I was a collegiate athlete, doing all the preventative stuff really helps.
Altogether, I’m having tons of fun and I’m so glad we didn’t hire this out! Let me know if you have any other questions; I’m an open book!
Without further ado, here is a thorough list of the tools we used and/or rented:
01.
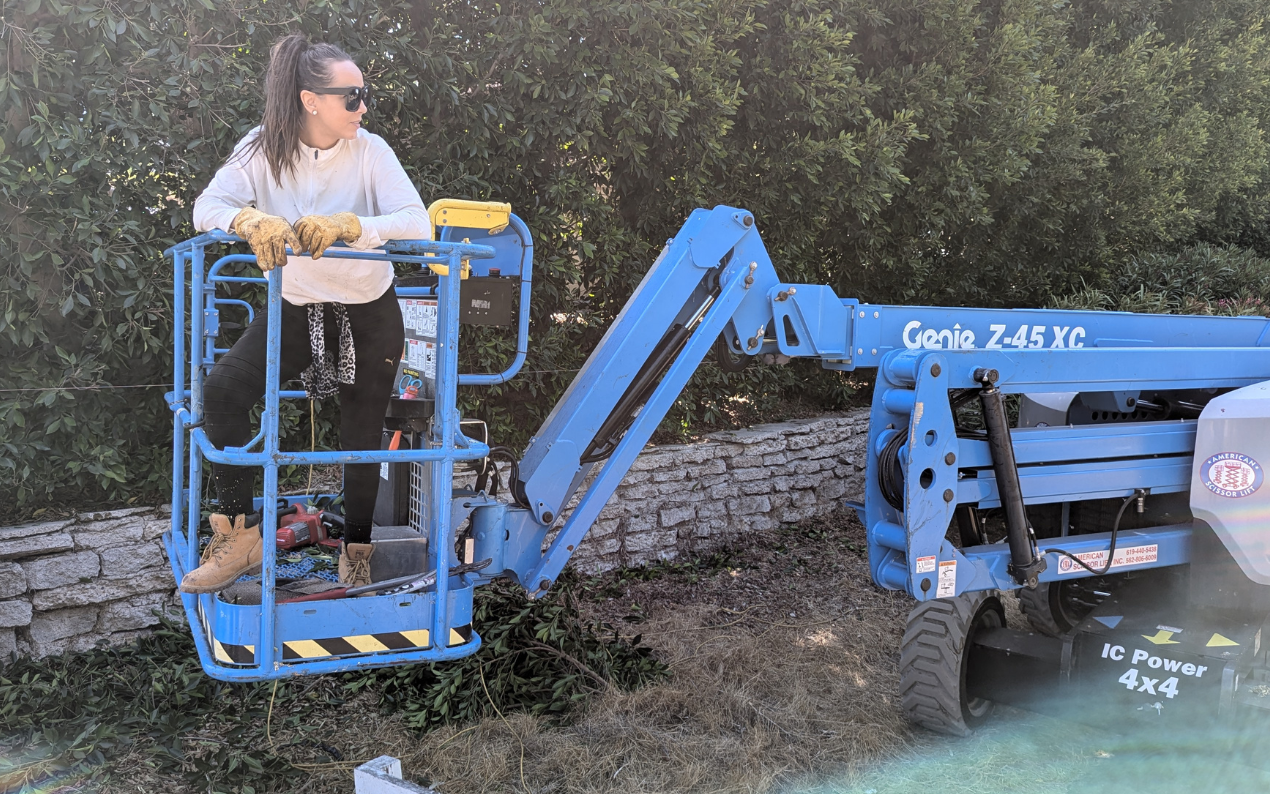
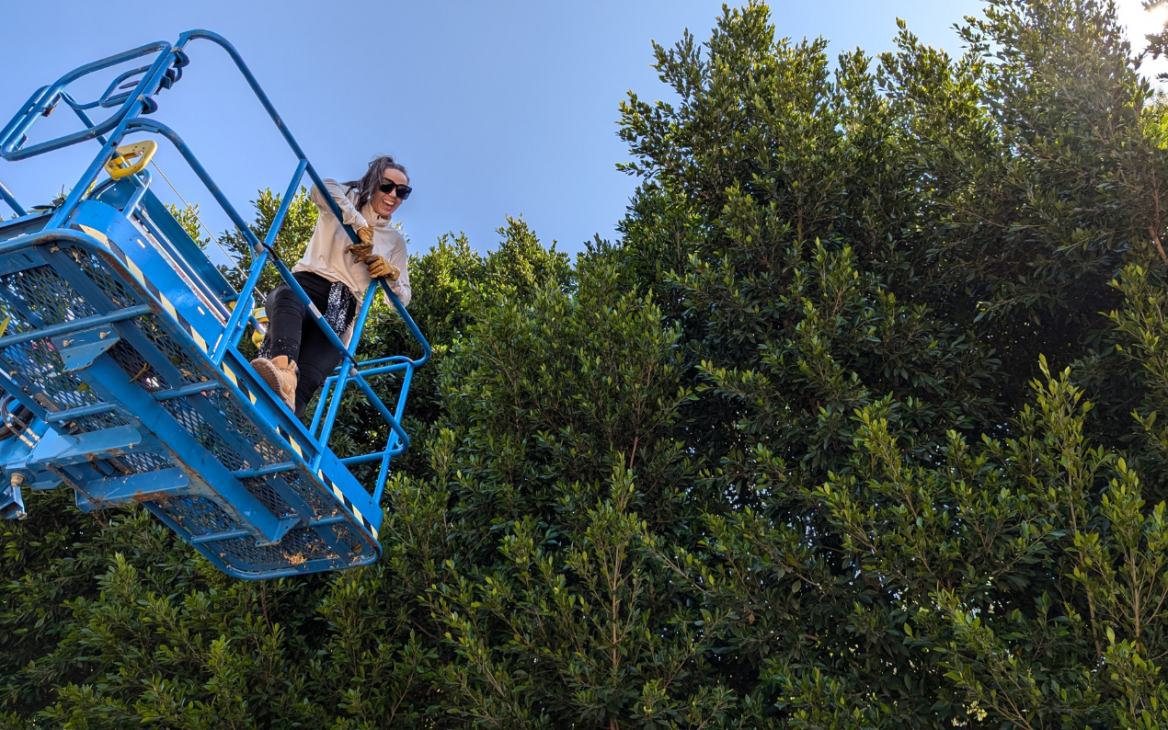
45′ Articulating Boom Lift
This boom lift is what makes doing this job so fun. It honestly feels like I’m on a roller coaster – which I love. We went with this model because it’s designed for outdoor use, and it can get you up and over the hedge too – which we needed. It runs on gas, and after having for two weeks, we’ve only had to fill it up once. I highly recommend the guys from American Scissor Lift; they were friendly and very knowledgeable, and this thing has been a LIFE SAVER. It’s been a marriage saver too – which is always helpful when doing DIY projects with your spouse!
It’s amazing what you can do when you decide there’s nothing you can’t do.
Lindsey
02.
Chain Saw
When I tell you I tried not to buy anything extra for this project, it’s no joke. We have owned this chainsaw for at least 12 years now, but I noticed it was cutting the branches weird yesterday, and it finally hit me that we needed to sharpen the blades. I’m going to try this sharpener, or possibly get new chains.
03.
Extendo Chain Saw (AKA: Go Go Gadget Pole Saw)
This extended reach chain saw has been a life saver for reaching the tops of the hedge and for the places that were tough to reach. It reaches about 6.5′, and although the blade isn’t huge, it’s cut through everything we needed it to cut. And it’s fast too. My hubby loves to use this saw! In fact, he gave it the MVP award after using it the second day!
04.
Extended Tree Trimmer
We also already had an extended tree trimmer, but ours has the rope mechanism, and it can be frustrating to work with. But this one – by the same company, looks awesome! New and improved; I already added it to my wishlist! I think having the right tools make the job so much easier!
05.
Tree Lopper
This 33″ tree limb lopper is a great tool to have if you’re trimming your hedge. It can cut up to 2″ limbs and you’ll reach for this again and again.
06.
Hedge Shears
When I was operating the boom lift solo and shearing the hedge, I used these shears like crazy. I actually rotated between these shears, the tree lopper, and the chain saw. But when my hubby was in charge of operating the lift, he’d line up the basket right next to the hedge, and just lift me straight up and I’d shear the hedge as we ascended with these electrical hedge trimmers. It was awesome and totally brilliant!
07.
Tie Back Chain
When deciding which cuts to make, I tried to not cut the main branches if possible. If possible. When I decided we could save a branch, I used this chain to secure the branch into place. If the main branch had some flex to it, I’d shove the boom lift basket right next to it, push it into place, then secure it to another tree (preferably one that was growing the opposite direction) with this chain to keep in where I wanted it to be. This is a must buy item if you’re doing this yourself. Even if you hire it out, get this and make the helpers use it. Tip: I always tie a loose fitting loop around the branches that I’m securing the chain to – to allow for the branch to grow without breaking the chain.
08.
String Level Kit
To ensure I cut the hedge in a straight line, we secured this string to 4-6′ rebar along the bottom 4′ of the hedge, then hammered them into place. For the top of the tree line, we used this rope and level kit to ensure we had a straight and level line for the top. This kit is a lifesaver! Tip, have one person hold the level while the other person secures the string. It was windy when we did this and we almost lost the level a few times.
09.
Sunscreen & Sun Protection
I made it my goal each day to see how many layers of sunscreen and sun protection I could use – in a healthy way. All of the items I used get a good rating on the EWG website for being in the healthier category for topical sunscreens. In the order that I applied them, here is the tinted sunscreen (SPF 30), powder sunscreen (SPF 50), foundation (SPF 15), and the spray sunscreen (SPF 30) that I used. I also highly recommend UPF rated clothing, long sleeves shirt (UPF 50+) and pants (UPF 50+), and this UPF 80+ rated hat that I have purchased twice! And don’t forget to protect your eyes with these stunning sunglasses.
Although it was hot and I sweated like crazy, my makeup didn’t wipe off, and just to make sure I was well protected, I reapplied the spray sunscreen every hour or two.
10.
Safety Cones
I had some safety cones left over from a previous project, so I didn’t need to buy any, but they were so helpful to maintain safety around the boom lift and where I was working. I guess if you won’t be working near other’s or on the street, you may not need these. But if you are, these cones look like they’d work great too.
11.
Snacks & Healthy Electrolyte Drinks & Energy Drinks
From beef sticks, to energy drinks, we’ve got you covered! One thing I found I needed more of while trimming our hedge, was easy snacks that were healthy and easy to digest – so I didn’t get tired before the time I wanted to stop working. I found I needed a lot more carbs than usual, and I drank one coconut water a day in addition to my Beam Glow drink (in the Blue Raspberry flavor) that helps keep my hormones in line. I also highly suggest doing food prep each week before jumping straight into working on the hedge. But if you don’t have food made, it’s going to feel like a major hassle to stick to your fitness goals. Click here for a full list of my gluten free snacks and drinks of choice!
12.
All the Tools I used
Everything that we used for this project you can find here.
13.
All the Tools I wanted to Buy to make this project easier and faster
Everything that you’ll need and the items I wish I would have purchased are on this list!
Tell me, would you ever try this? Would you hire it out? Did I miss anything?